
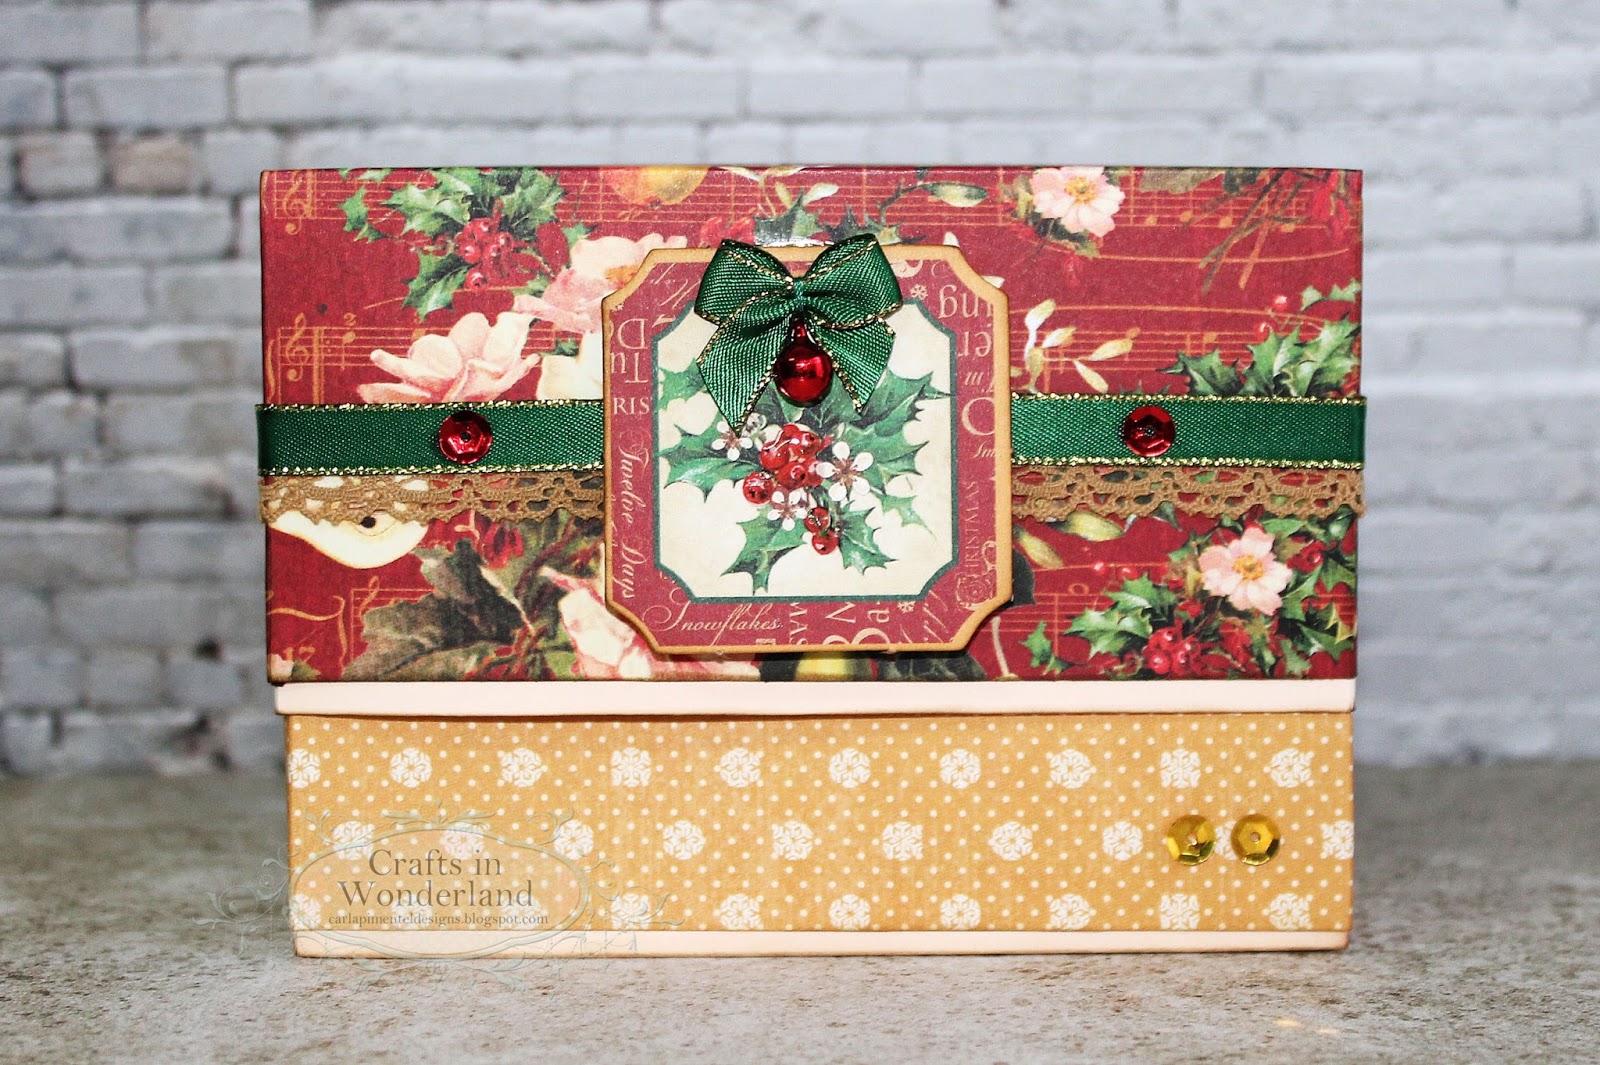
Este mês decidi trazer um mini projeto, muito simples,
inspirado numa imagem que vi na internet e que é tão fácil que conseguirá fazer
numa tarde!
This month I decided to bring a mini project,
very simple, inspired by an image that I
saw on the internet and it’s so easy you’ll be able to do it in an afternoon!


Vai precisar de:
You’ll need:
2
cartolinas A4 para a caixa / 2 A4
cardstock for the box
2
cartolinas A4 para os separadores/ 2 A4
cardstock for the dividers
2 folhas de
papel de scrpbooking de 12”x12” para decorar o exterior (utilizei restos da
coleção 12 Days to Christmas da Graphic
45)/ 2 sheets of scrapbooking paper with
12”x12” to decorate the outside (I used remains of the collection 12 Days to
Christmas from Graphic 45)
10 folhas
de papel de scrapbooking de 6”x6” para decorar os 5 separadores na frente e
verso/ 10 sheets of scrapbooking paper with 6”x6” to decorate the dividers
front and back
Cartões recortados, fitas, rendas e outros elementos a gosto
para decorar / Chipboard Die Cuts,
ribbons, lace and other elements to decorate as desired
Fita cola de dupla face / Double-sided tape
Glossy accents
Almofadas
3D /3D foam pads
Distress Ink Vintage Photo – opcional / optional
We R Memory
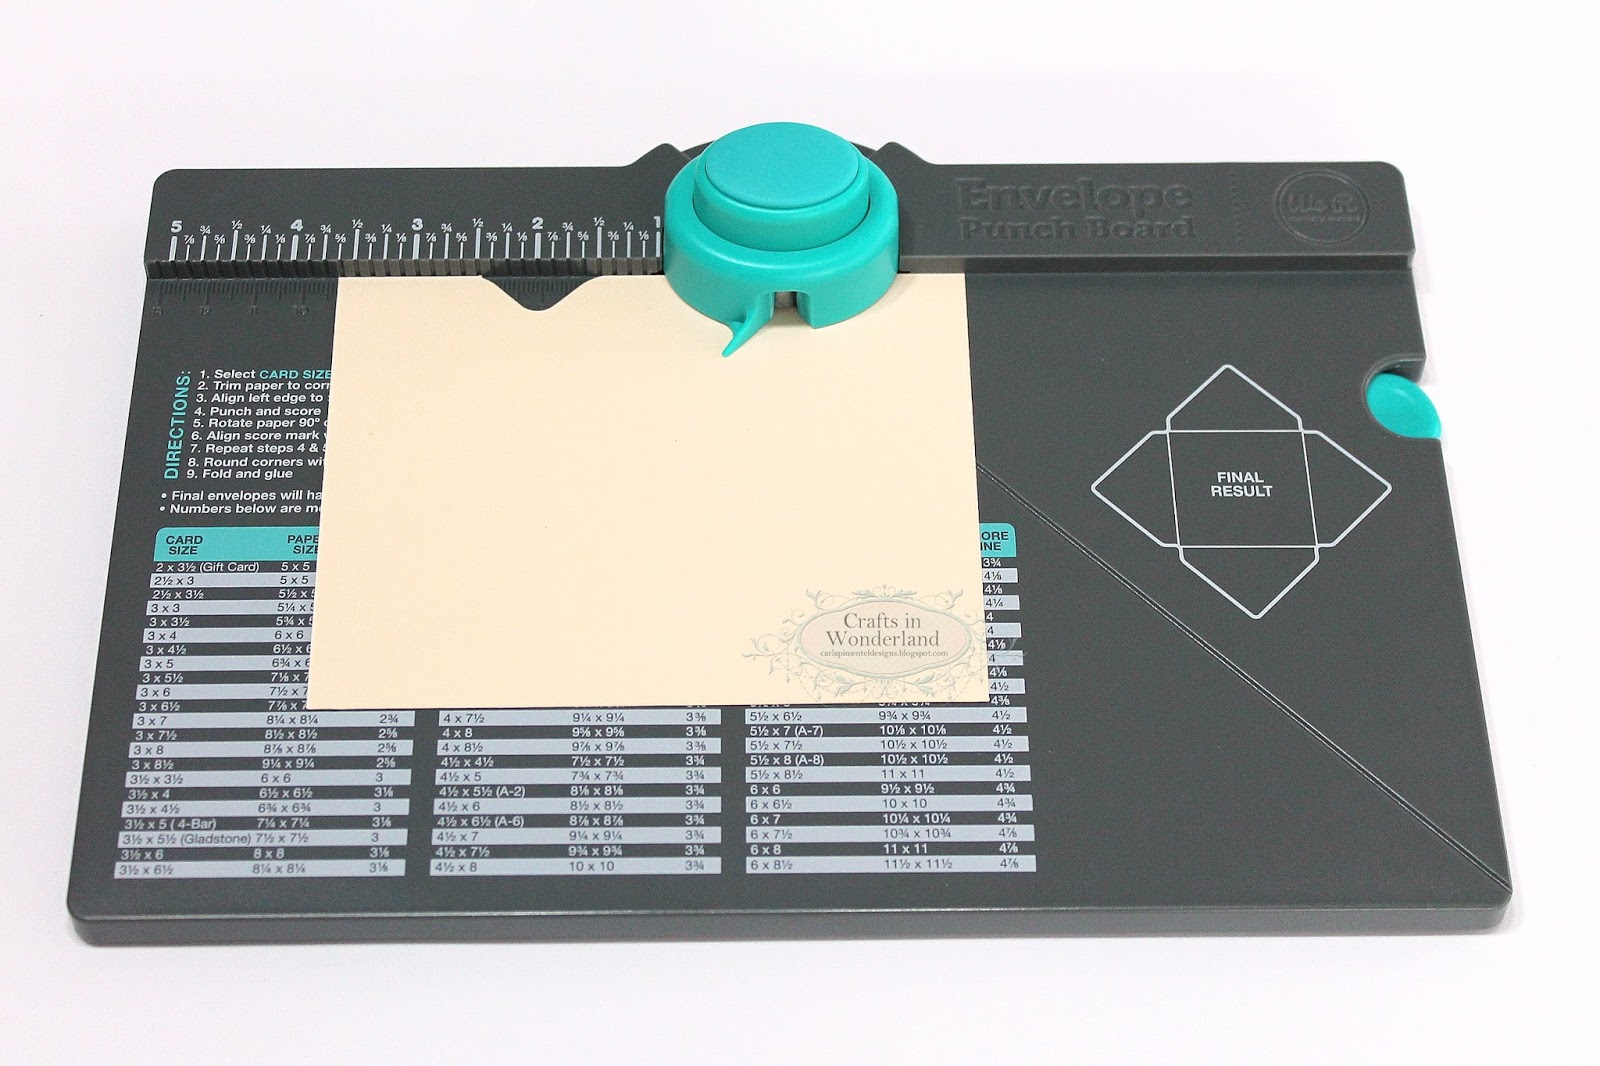
Keepers Envelope punch board – opcional /
optional
Arredondador de cantos – opcional / Corner chomper optional
Cisalha e vincadora / Paper trimmer and Score Board
Como fazer:
How to do it:
Corte 1 cartolina A4 com 10 3/8” x 6 ¾” para a base da caixa e outra com 11” x 7 3/8”
para a tampa da caixa.
Cut 1 A4 cardstock with 10 3/8” x 6 ¾” to make the box base and other with 11” x 7 3/8” for the box
cover.

Vinque a cartolina da base da caixa a 2 ½” nos 4 lados e a
cartolina para a tampa a 2 ¾” também nos 4 lados.
Score the box base cardstock at 2 ½” on all 4 sides and the cardstock for the
box cover at 2 ¾” also on all 4 sides.

Dobre todas as linhas que fez com uma dobradeira.
Crease all score lines that you made with a
bone folder.

Faça cortes na vertical nos lados maiores de ambas as
cartolinas, ao longo das linhas de dobra. Corte na diagonal os 4 cantos de cada
cartolina.
Make vertical cuts in the longer sides of both
cardstocks, following the score lines. Cut off diagonally across the 4 corners
of each cardstock.

Aplique fita cola de dupla face nos triângulos dos cantos e
cole-os no interior da base da caixa e da tampa.
Apply double-sided tape on the triangles of the
corners and glue them inside the base of the box and cover.


Para forrar a tampa da caixa corte 1 folha de papel com 10
¾” x 7 ¼” e vinque-a nos 4 lados a 2
5/8”. Faça as dobras e corte-a como fez para a tampa.
To line the box cover cut 1 sheet of paper with
10 ¾” x 7 ¼” and crease it on 4 sides at 2 5/8”. Make the folds and cut it like
you did for the cover.


Cole primeiro a parte superior, depois os lados e por fim a
parte da frente e de trás.
First glue top, then sides and finally front
and back of the box.


Para decorar a base corte 2 tiras de papel com 2 ¼ de altura
x 12”. Cole a toda a volta da base. (Corte o excesso de papel.) Agora só
precisa decorar a gosto e está pronta a caixa.
To decorate the base cut 2 stripes of paper
with 2 ¼ in height x 12”. Glue all the
way around the base. (Cut the excess paper). Now you just need to decorate as
desired and the box is ready.

Para fazer os separadores cortei 2 cartolinas A4 em
retângulos de 5 ¼” x4”.
To make the dividers I cut 2 A4 cardstocks in rectangles with 5 ¼” x4”.
Com o Envelope Punch Board da WRMK fiz as etiquetas
superiores. (Pode fazer as suas de outra forma) . Comecei por fazer o primeiro
corte, virei a cartolina ao contrário e posicionei o bico do triângulo a uma
distância de 2” à esquerda. Fiz o 2º corte. Removi a parte superior da
cartolina desde a etiqueta até aos lados do separador. Cortei as etiquetas em
posições diferentes nos vários separadores.
I made the top labels with Envelope Punch Board
from WRMK. (You can make yours otherwise). I started by making the 1st
cut, turned the cardstock other side and positioned the tip of the triangle at
a distance of 2” on the left. Made the 2nd cut. I removed the upper
part of the cardstock from the label to
the sides of the divider. I cut labels in different positions in the various
dividers.


Por fim
cortei papeis para decorar os separadores na frente e verso dos mesmos e
arredondei os cantos. Ao todo fiz 5 separadores: Entradas, Peixe, Carne, Sobremesas
e Bebidas, a pensar numa Noite de Consoada!
Finally I cut papers to decorate the dividers, on
both sides of them and rounded the corners. In all I made 5 dividers: starters,
fish, meat, desserts and drinks thinking about Christmas Eve!


Bom trabalho e até breve!
Good work and see you soon!